So, you’ve planted your fruit tree, you’ve got your wires or trellis ready, and you’re dreaming of neat rows of apples or pears hanging within easy reach. But here’s the truth: without pruning, that dream will never happen.
Left on its own, your tree will just grow as trees do—straight up, branches out, a bit wild. That’s fine in an orchard. But for espalier, you’re asking your tree to do something very different: grow flat, stay neat, and focus on producing fruit in the right places.
And the only way to make that happen is through pruning.
Pruning Explained Simply
Pruning might feel intimidating, but the reasons behind it are simple. Here’s why it matters so much:
-
Shape – You decide the design.
Trees don’t naturally grow in perfect flat layers. They send branches wherever they like. Pruning lets you “edit” the tree so it grows the way you want—along wires, in tiers, or fanned out. Each cut is like steering the tree onto the right track. -
Fruit – Less wood, more apples and pears.
If you let your tree keep every shoot, it spends all its energy making leaves and branches. By cutting back the extras, you tell the tree: “Don’t waste energy here—put it into fruit instead.” That’s how espalier trees produce more fruit per square metre than regular trees. -
Health – Sunlight and airflow matter.
A crowded tree is a damp, shady tree. That’s where pests and diseases thrive. By pruning, you open the tree up. Air flows through, rain dries quickly, and sunlight reaches every spur. This keeps your tree healthier, naturally. -
Manageability – Small jobs, not big rescues.
A well-pruned espalier is actually easier to care for than a free-standing tree. Why? Because you’re making small, regular trims each season instead of wrestling with an overgrown mess later. It’s the same idea as keeping up with haircuts instead of shaving your head after a year of tangles!
Put simply: pruning is how you turn a tree into an espalier. Without it, you just have a fruit tree against a wall.
When Should You Prune?
Espalier trees need attention in two seasons every year:
-
Winter (the big-picture work):
The tree is asleep, with no leaves. This is when you build or extend the framework—choosing the main arms, trimming the central leader, and locking in the structure. Winter cuts encourage strong new growth in spring. -
Summer (the tidy-up work):
The tree is full of energy, shooting out leafy stems everywhere. This is when you shorten those whippy new shoots down to just a few leaves. These short stubs turn into fruiting spurs, and they also keep the tree looking neat.
Think of it this way:
-
Winter sets the shape.
-
Summer builds the fruit.
Both are equally important.
How to Prune (The Basics)
Here’s the simplest way to approach pruning your espalier:
-
Pick the branches you want
Choose the arms that fit your design (left and right along the wire). Cut off the ones pointing the wrong way. -
Tie them in
Gently tie your chosen arms along the wires while they’re young and flexible. Don’t wait until they’re thick and stiff. -
Cut the extras
In summer, snip long side shoots back to 2–3 leaves. This stops them from turning into messy branches and instead creates little fruiting spurs. -
Step back often
Every few cuts, walk back a few steps. Does it still look balanced and flat? If not, make small adjustments now rather than later.
Mistakes Beginners Often Make
-
Waiting too long – One missed season can mean a jungle of growth to tame.
-
Cutting too hard – Your tree still needs plenty of leaves to make food. Don’t strip it bare.
-
Trying to bend old wood – If it’s stiff, it’ll snap. Always train young shoots.
-
Skipping summer pruning – Without those quick snips, you won’t get fruiting spurs.
First Year Pruning Schedule (Month by Month)
Here’s a simple calendar you can follow in your first year. This assumes you’ve just planted a young apple or pear tree and want to train it as a horizontal espalier.
Planting Day (Winter or Early Spring):
-
Plant your tree near your wires or trellis.
-
If it’s just a straight whip (no side branches), cut it off just above your first wire. This encourages side shoots exactly where you need them.
-
Tie the trunk loosely to a stake so it grows upright.
Spring (March–April):
-
New shoots appear. Keep the central trunk growing upwards if you want more tiers later.
-
Choose two strong shoots at the height of the first wire—one left, one right. These will become your first arms.
-
Remove any shoots growing straight out into the garden or back toward the wall.
Early Summer (May–June):
-
Tie your two chosen arms gently along the first wire while they’re soft and flexible.
-
Don’t force stiff branches flat—better to remove them and use new shoots.
-
Let the central trunk keep growing up if you’re planning for a second tier next year.
Mid-Summer (July):
-
Your tree will be throwing out lots of leafy side shoots. Snip these back to 2–3 leaves.
-
Those little stubs will become fruiting spurs.
-
Keep tying the arms as they grow longer along the wire.
Late Summer (August–September):
-
Do another tidy-up: shorten new side shoots to 2–3 leaves again.
-
Remove any vertical water shoots (those fast-growing stems shooting straight up).
-
Step back and check: your tree should be flat and balanced.
Autumn (October–November):
-
Stop pruning now. Let the tree wind down for winter.
-
Check ties and loosen any that are tight so they don’t dig into the bark.
Winter (December–February, Year 1):
-
With the leaves gone, it’s time to shape again.
-
Trim the ends of your arms neatly along the wire.
-
If the central trunk has reached the second wire, cut it just above that wire so new side shoots form next spring for your second tier.
-
Remove any weak, damaged, or misplaced branches.
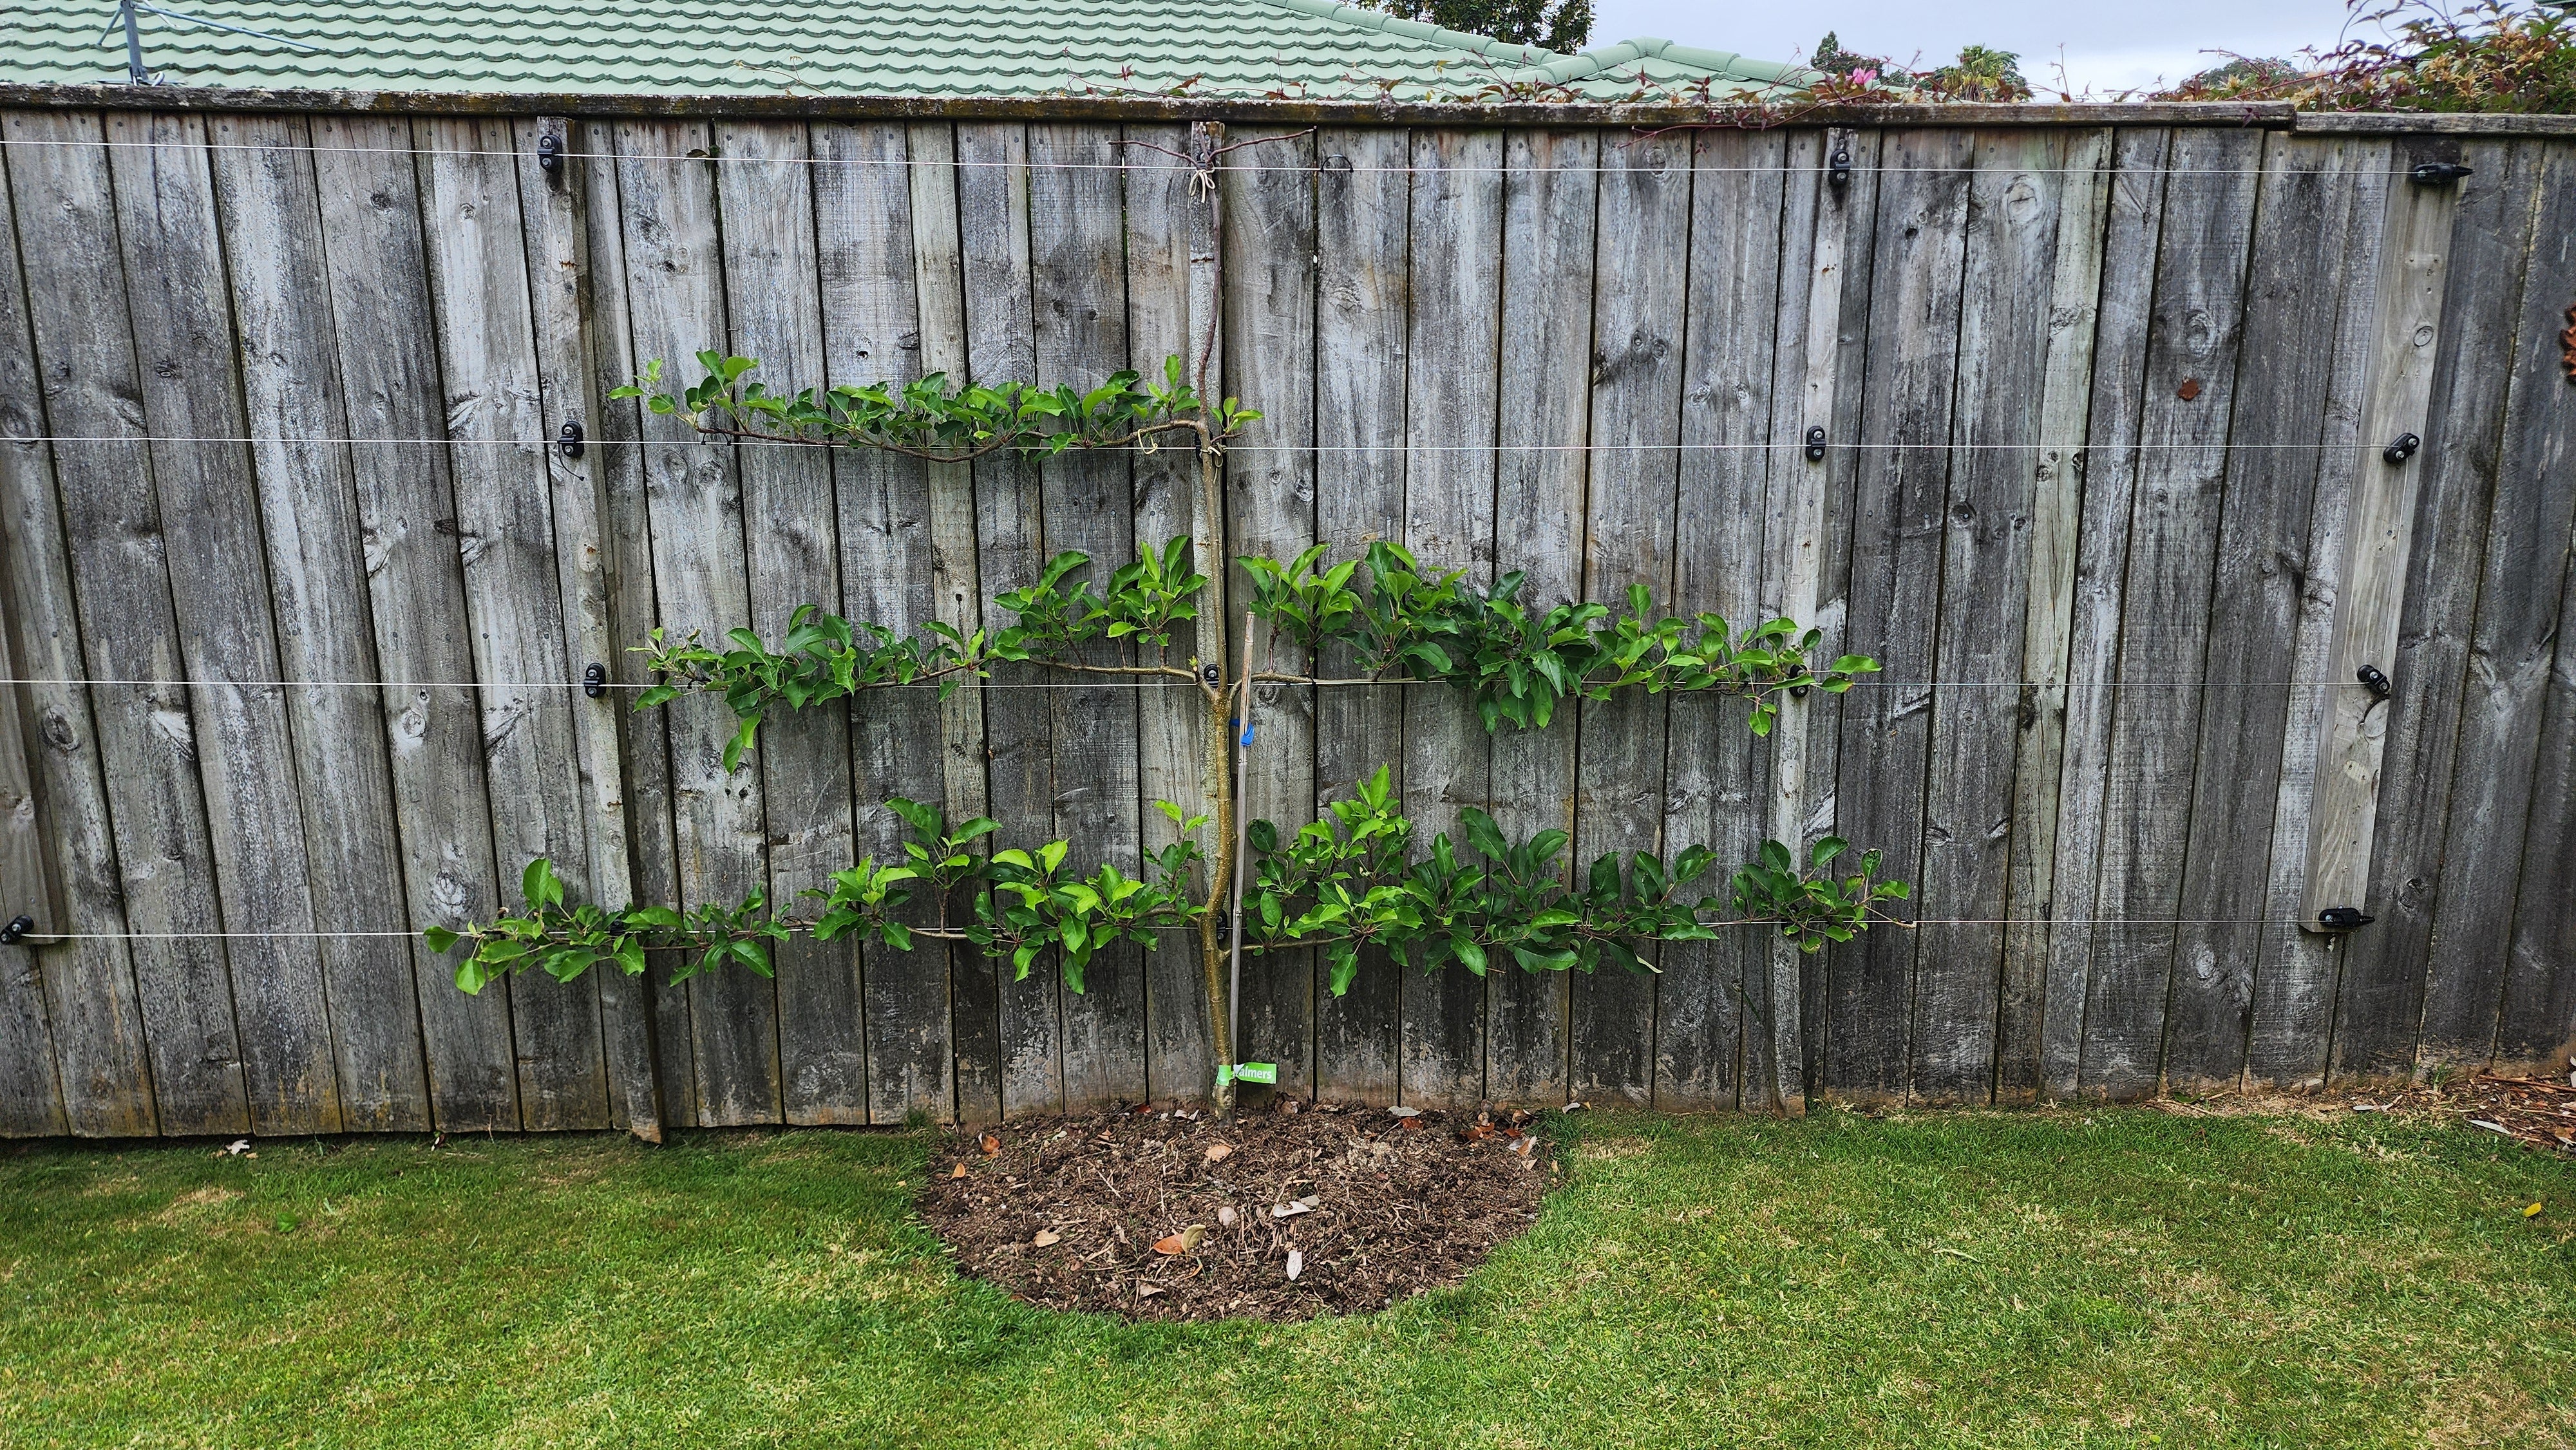
What You’ll Have After Year One
By the end of the first year, your espalier should have:
-
Two arms trained flat along the first wire
-
A central trunk tied upright, ready for a second tier
-
Short stubby side shoots along the arms (future fruiting spurs)
-
A neat, flat shape instead of a wild mess
This is the foundation. Each year builds on it, but if you nail Year One, the rest becomes much easier.